Brake pads wear down over time, and every car owner will eventually face the need to replace them. Learning how to change brake pads yourself can save you hundreds of dollars in labor costs while giving you confidence in your vehicle’s safety. This comprehensive guide walks you through the entire brake pad replacement process, from identifying worn pads to completing the job like a professional mechanic.
Signs Your Brake Pads Need Replacement
Your car provides several warning signals when brake pads reach the end of their service life. Squealing or grinding noises during braking indicate the friction material has worn thin. A high-pitched squeal typically means the wear indicator is touching the rotor, while grinding sounds suggest metal-on-metal contact that can damage rotors permanently.
Visual inspection reveals the most accurate assessment of pad condition. Brake pads should measure at least 3mm thick. Anything thinner requires immediate replacement. You’ll also notice brake dust accumulation around wheels increases significantly when pads wear down.
Your brake pedal behavior changes with worn pads. The pedal may feel spongy, require more pressure than usual, or the car might pull to one side during braking. These symptoms demand prompt attention to maintain safe driving conditions.
Dashboard warning lights in newer vehicles alert you to brake system issues. The brake warning light activates when sensors detect pad thickness below safe limits. Never ignore these electronic warnings.
Essential Tools and Materials
Successful brake pad replacement requires specific tools and quality parts. Start with a complete socket set, including metric sizes common in automotive applications. A tire iron removes lug nuts, while a floor jack and jack stands provide safe vehicle support.
Brake-specific tools make the job easier and safer. A brake caliper piston compression tool retracts pistons to accommodate new, thicker pads. C-clamps can substitute but require more effort. Brake cleaner removes debris and old brake fluid from components.
Quality brake pads match your driving style and vehicle requirements. Ceramic pads offer quiet operation and low dust production, making them ideal for daily drivers. Semi-metallic pads provide superior stopping power for performance vehicles or heavy-duty applications. Organic pads cost less but wear faster than other materials.
Safety equipment protects you during the repair process. Safety glasses prevent brake dust and debris from entering your eyes. Gloves protect hands from sharp edges and chemicals. Work clothes you don’t mind getting dirty complete your preparation.
Safety Precautions Before Starting
Park your vehicle on level ground away from traffic. Engage the parking brake firmly and place wheel wedges behind wheels you’re not working on. This prevents the car from rolling during the repair process.
Allow brakes to cool completely before starting work. Hot brake components can cause severe burns and make handling difficult. Plan brake pad replacement when the car hasn’t been driven for several hours.
Brake dust contains harmful particles that can damage your respiratory system. Work in well-ventilated areas and consider wearing a dust mask. Avoid using compressed air to clean brake components, as this spreads dust particles into the surrounding area.
Never work under a vehicle supported only by a jack. Jack stands provide stable, secure support that won’t fail unexpectedly. Position stands on solid frame members or designated lifting points specified in your owner’s manual.
Step-by-Step Brake Pad Replacement Process
Preparation and Vehicle Setup
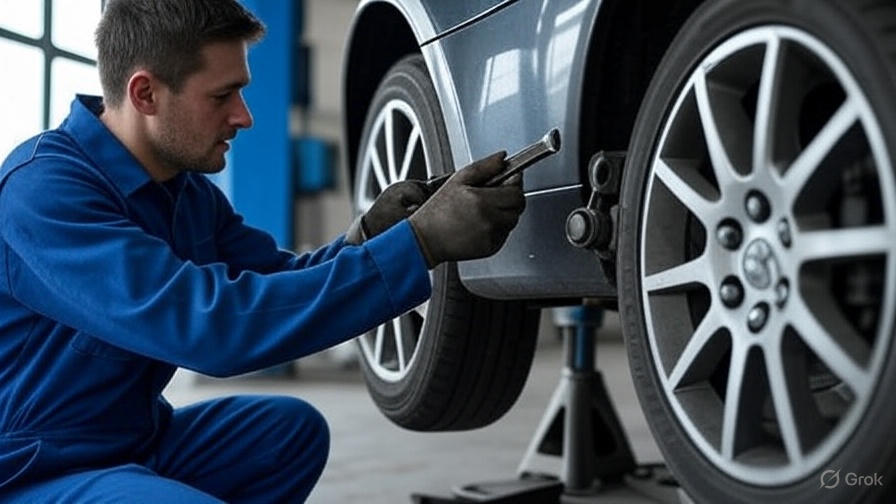
Begin by loosening lug nuts while the wheel remains on the ground. This prevents the wheel from spinning when you apply force to the lug wrench. Loosen nuts in a star pattern but don’t remove them completely yet.
Locate proper jack points using your owner’s manual. These reinforced areas support the vehicle’s weight safely. Position your floor jack securely and raise the vehicle until the wheel clears the ground. Install jack stands immediately after lifting.
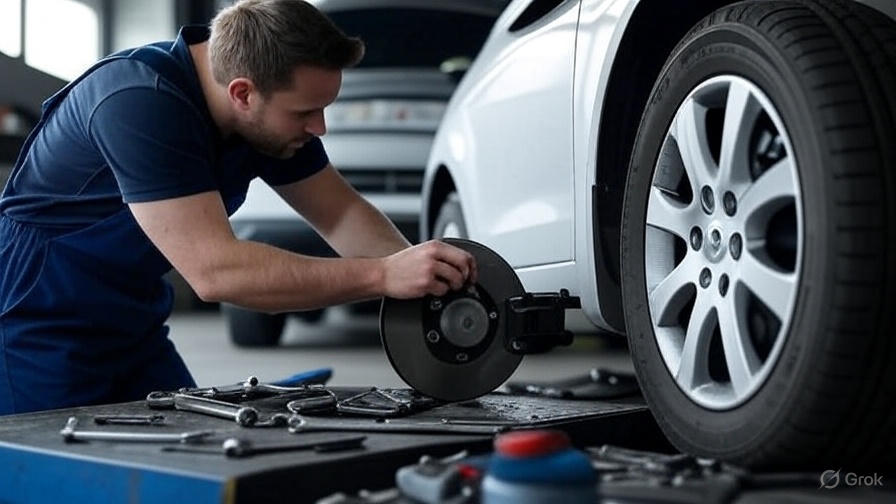
Remove lug nuts completely and pull the wheel straight toward you. Clean the wheel hub area with brake cleaner to remove accumulated brake dust and road grime. This prevents contamination of new brake components.
Caliper Removal and Inspection
Locate the brake caliper bolts, typically found on the backside of the caliper assembly. These bolts secure the caliper to the caliper bracket. Remove the lower bolt first, then swing the caliper upward to access the brake pads.
Some caliper designs require complete removal. Remove both caliper bolts and lift the caliper carefully. Support the caliper with wire or a bungee cord to prevent strain on the brake hose. Never let the caliper hang by the brake line alone.
Inspect the caliper for leaks, cracks, or excessive corrosion. Brake fluid leaks appear as dark stains around piston seals. Cracked caliper bodies require replacement before installing new pads. Clean all visible surfaces with brake cleaner.
Old Brake Pad Removal
Slide old brake pads out of their mounting positions. Note their orientation and position before removal. Take photos with your phone to reference during reassembly. Some pads have directional arrows or markings that must face specific directions.
Examine the old pads for wear patterns. Even wear across the pad surface indicates normal operation. Uneven wear suggests caliper problems, warped rotors, or suspension issues that need attention before installing new pads.
Clean the caliper bracket thoroughly with brake cleaner. Remove all traces of brake dust, rust, and old lubricant. Wire brushes help remove stubborn corrosion from pad contact surfaces. Apply thin coats of brake lubricant to prevent squealing.
Brake Rotor Inspection and Service
Remove the rotor by pulling it straight off the hub. Some rotors have small screws holding them in place during manufacturing. Remove these screws if present. Stuck rotors may require gentle tapping with a dead blow hammer.
Measure rotor thickness with calipers at multiple points. Compare measurements to specifications in your service manual. Rotors below minimum thickness require replacement. Check for scoring, cracking, or heat damage on both rotor surfaces.
Resurface rotors if they show minor scoring or uneven wear. Machine shops can restore rotor surfaces for a fraction of replacement cost. New rotors often require this service to remove protective coatings and achieve proper surface finish.
Installing New Brake Pads
Apply brake lubricant to contact points between pads and caliper brackets. Use lubricant sparingly and avoid getting any on friction surfaces. High-temperature brake grease prevents squealing and allows smooth pad movement.
Install new pads in the same orientation as the old ones. Inner and outer pads often differ in design and won’t fit in wrong positions. Ensure pad backing plates sit flush against caliper bracket surfaces.
Some brake pads include new hardware like clips and springs. Replace all hardware as specified by the manufacturer. Old hardware may not provide adequate retention or anti-rattle performance with new pads.
Caliper Piston Compression
New brake pads are thicker than worn pads, requiring caliper piston retraction. Use a brake caliper compression tool or large C-clamp to slowly push the piston back into its bore. This process forces brake fluid back into the master cylinder reservoir.
Monitor brake fluid levels during piston compression. The master cylinder reservoir may overflow as pistons retract. Remove excess fluid with a turkey baster or syringe to prevent spills that can damage paint and surrounding components.
Compress pistons slowly and evenly. Rapid compression can damage caliper seals or force air into the brake system. Stop if you encounter unusual resistance or hear strange noises during compression.
Caliper Reinstallation
Position the caliper over new brake pads carefully. Align bolt holes and thread caliper bolts by hand initially. This prevents cross-threading that can damage expensive caliper brackets or bolts.
Torque caliper bolts to manufacturer specifications using a torque wrench. Under-tightened bolts can work loose and cause brake failure. Over-tightened bolts may strip threads or crack caliper components. Typical torque values range from 25-80 foot-pounds depending on vehicle size.
Double-check that brake pads sit properly in their brackets and that the caliper moves freely. Pads should not bind or stick in their mounting positions. Any resistance indicates improper installation that requires correction.
Post-Installation Procedures
System Testing and Bleeding
Pump the brake pedal several times before starting the engine. The pedal should feel firm and return to its normal position. A spongy or low pedal indicates air in the system that requires bleeding.
Check brake fluid levels and top off if necessary. Use only brake fluid specified for your vehicle. DOT 3, DOT 4, and DOT 5.1 fluids are glycol-based and interchangeable. DOT 5 is silicone-based and not compatible with other types.
Test brake operation at low speeds in a safe area. Brakes may feel different initially as new pads conform to rotor surfaces. Avoid hard braking for the first 200 miles to allow proper pad break-in.
Break-In Procedure
New brake pads require gradual break-in to achieve optimal performance. Start with gentle stops from moderate speeds. Avoid coming to complete stops during initial break-in when possible, as this can create uneven pad deposits on rotors.
Perform a series of medium-effort stops from 35 mph down to 5 mph, allowing brakes to cool between applications. This process transfers a thin layer of friction material to rotor surfaces, creating the interface necessary for proper braking.
Complete break-in typically requires 200-300 miles of normal driving. During this period, expect some brake dust and possibly minor squealing as components settle. Avoid towing, mountain driving, or racing until break-in is complete.
Common Mistakes to Avoid
Never compress caliper pistons without opening the bleeder valve if your brake system is contaminated. Dirty fluid forced back into the master cylinder can damage internal components. Open bleeder valves and let old fluid drain during piston compression when necessary.
Avoid getting brake lubricant on friction surfaces. Contaminated pads and rotors won’t stop effectively and may require replacement. Clean any lubricant spills immediately with brake cleaner.
Don’t ignore rotor condition when replacing pads. Installing new pads on damaged rotors wastes money and compromises braking performance. Always inspect and service rotors as needed.
Skipping the break-in procedure leads to poor brake performance and shortened pad life. New pads need time to properly mate with rotor surfaces. Rushing this process causes uneven wear and reduced stopping power.
Maintenance and Longevity Tips
Regular brake inspections prevent emergency replacements and expensive rotor damage. Check pad thickness every 12,000 miles or during tire rotations. Early detection allows planned replacement at your convenience rather than emergency repairs.
Driving habits significantly impact brake pad life. Smooth, gradual stops extend pad life compared to aggressive braking. Anticipate traffic conditions and use engine braking when possible to reduce brake system wear.
Quality brake pads cost more initially but often provide better value through longer life and superior performance. Premium pads also produce less dust and operate more quietly than budget alternatives.
Keep brake fluid fresh by replacing it every 2-3 years. Old brake fluid absorbs moisture that can cause internal corrosion and reduced braking effectiveness. Fresh fluid maintains consistent pedal feel and prevents component damage.
Conclusion
Replacing brake pads yourself provides substantial cost savings while ensuring the job gets done right. This essential maintenance skill builds confidence in your mechanical abilities and helps you better understand your vehicle’s braking system.
The process requires attention to detail and proper tools but remains within reach of most DIY mechanics. Take your time, follow safety procedures, and don’t hesitate to consult professional help if you encounter unexpected problems.
Regular brake maintenance protects your investment in your vehicle while keeping you and your passengers safe. Well-maintained brakes provide reliable stopping power for years of trouble-free driving. Master this skill, and you’ll never worry about brake pad replacement again.