The Mazda 5 remains a popular choice for families who need versatile seating arrangements and reliable transportation. However, like many vehicles with complex folding seat mechanisms, the middle row latch system can develop problems over time. When your Mazda 5’s second row seat latch fails to work properly, it creates frustration and limits your vehicle’s functionality.
This comprehensive guide walks you through diagnosing and repairing common Mazda 5 middle row latch issues. You’ll learn to identify the root cause of your problem, gather the right tools, and complete the repair safely. Most importantly, you’ll save hundreds of dollars in dealership fees while gaining valuable mechanical knowledge.
Common Mazda 5 Middle Row Latch Problems
The second row seating system in your Mazda 5 relies on several interconnected components to function smoothly. When one part fails, the entire mechanism can become unreliable or completely inoperative.
Stuck Release Mechanism
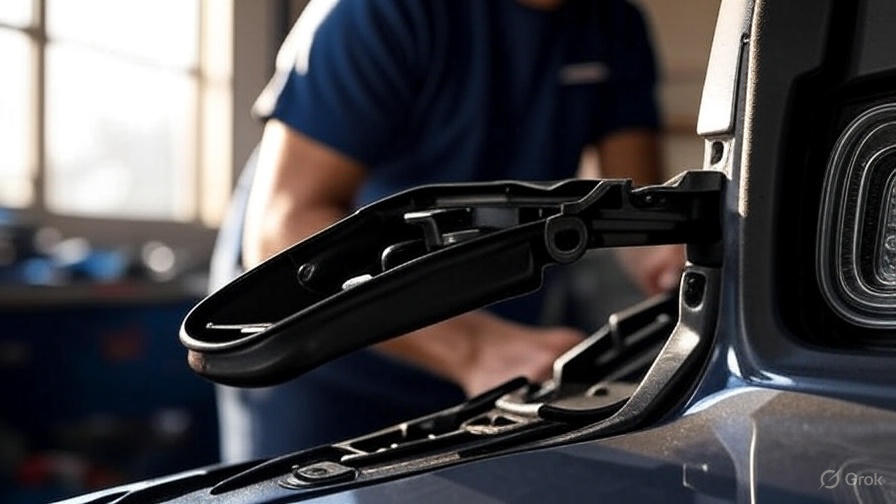
The seat back release mechanism wire has a plastic cylinder surrounding it, say 10cm long and 1cm diameter. There’s a narrow slit with two metal sliders visible underneath. Many owners report that their release handle becomes stuck in the engaged position, preventing the seatback from folding forward.
The plastic housing around the release cable can crack or warp due to temperature changes and repeated use. When this happens, the internal sliders bind against the damaged plastic, creating resistance that makes the mechanism feel frozen.
Latch Won’t Secure Properly
Sometimes the opposite problem occurs – your seat folds down easily but refuses to latch back into the upright position. This issue typically stems from worn or damaged latch components inside the seat frame. The metal catch mechanism may become bent, or the spring tension might weaken over time.
Intermittent Operation
Frustratingly, some Mazda 5 owners experience intermittent latch problems where the mechanism works sometimes but fails at other times. This inconsistent behavior usually indicates internal components that are partially damaged or contaminated with debris.
Complete Mechanism Failure
In severe cases, the entire latch system stops responding to input. The release handle might move freely without engaging the mechanism, or the seat might become permanently locked in one position.
Tools and Materials You’ll Need
Before starting your repair, gather these essential tools and supplies:
Basic Hand Tools:
- Flathead screwdriver (medium and small sizes)
- Phillips head screwdriver set
- Needle-nose pliers
- Socket wrench set (8mm, 10mm, 12mm sockets)
- Trim removal tools or plastic prying tools
Cleaning and Lubrication Supplies:
- White lithium grease or marine-grade grease
- Penetrating oil (WD-40 or similar)
- Clean rags or shop towels
- Wire brush or old toothbrush
- Compressed air canister
Safety Equipment:
- Work gloves
- Safety glasses
- Flashlight or LED work light
Replacement Parts (if needed):
- Seat latch mechanism assembly
- Release cable
- Spring clips
- Mounting hardware
Most repairs only require cleaning and lubrication, but having replacement parts on hand prevents project delays if you discover damaged components.
Step-by-Step Diagnosis Process
Proper diagnosis saves time and prevents unnecessary parts replacement. Start with simple checks before disassembling components.
Visual Inspection
Begin by examining the visible portions of your seat latch mechanism. Look for obvious damage like cracked plastic housing, bent metal components, or loose connections. Pay special attention to the release handle and cable routing.
Remove any floor mats or debris around the seat base that might interfere with the mechanism. Check for foreign objects wedged in the latch assembly or pivot points.
Function Testing
Test the seat operation from both the normal release position and from different angles. Try operating the mechanism while applying slight upward or downward pressure on the seatback. This helps identify whether the problem stems from misalignment or component damage.
Listen carefully during operation. Grinding noises suggest metal-on-metal contact where lubrication has failed. Clicking sounds often indicate broken plastic components or loose hardware.
Cable and Connection Check
Trace the release cable from the handle to the latch mechanism. Look for kinks, fraying, or disconnected ends. The cable should move smoothly when you operate the handle, with no binding or excessive slack.
Inspect all connection points where the cable attaches to both the handle and the latch assembly. Loose connections here cause most intermittent operation problems.
Repair Procedures for Common Issues
Now that you’ve identified the problem, let’s walk through specific repair procedures for each common failure mode.
Fixing a Stuck Release Mechanism
With a small screwdriver jiggle the wire and sliders through the gap to release one of the sliders that has got stuck. This technique often provides immediate relief for binding mechanisms.
Start by locating the plastic cylinder housing around the release cable mechanism. You’ll typically find this near where the cable enters the seat frame structure. Use your flashlight to identify the narrow slit mentioned in the repair guidance.
Insert a small flathead screwdriver into the slit between the metal sliders. Apply gentle pressure while moving the screwdriver back and forth to separate any stuck components. Be patient – forcing the mechanism can cause permanent damage.
Once you’ve freed the stuck slider, operate the release handle several times to ensure smooth movement. Apply a small amount of white lithium grease to the slider surfaces before reassembling any covers.
Cleaning and Lubricating the Mechanism
Most latch problems result from accumulated dirt, debris, or dried lubricant. A thorough cleaning often restores full functionality without replacing parts.
Remove the seat cushion to access the latch mechanism fully. Most Mazda 5 seats use simple clips or push-pins to secure the cushion. Consult your owner’s manual for specific removal procedures if you’re unsure.
Spray penetrating oil on all pivot points, springs, and sliding surfaces. Allow the oil to soak for 10-15 minutes before attempting to operate the mechanism. Use compressed air to blow out loose debris and old grease.
Clean all metal surfaces with a wire brush or stiff-bristled brush to remove corrosion and built-up grime. Pay special attention to spring attachment points and the main latch pivot.
Apply fresh white lithium grease to all moving parts. Focus on areas where metal components slide or rotate against each other. Avoid over-lubricating, as excess grease attracts dirt and debris.
Replacing Damaged Components
When cleaning and lubrication don’t solve the problem, component replacement becomes necessary. Most commonly, you’ll need to replace the release cable, latch spring, or the entire latch assembly.
Cable Replacement:
Disconnect the old cable from both the release handle and the latch mechanism. Note the cable routing before removal to ensure proper installation of the replacement.
Feed the new cable through the same path as the original, avoiding sharp edges or pinch points that could cause premature failure. Secure all cable clips and guides to prevent rattling or interference with other components.
Test the cable tension by operating the release handle. The cable should have slight slack when the latch is engaged but no excessive looseness that delays operation.
Latch Assembly Replacement:
Remove the mounting bolts that secure the latch assembly to the seat frame. These are typically 10mm or 12mm bolts accessible from underneath the seat.
Compare the old and new assemblies to ensure proper part matching. Install the new assembly using the original mounting hardware unless the bolts show signs of damage or corrosion.
Adjust the latch position if necessary to ensure proper alignment with the striker on the seatback. The latch should engage smoothly without binding or excessive force.
Addressing Alignment Issues
Sometimes the latch mechanism works perfectly, but the seat won’t stay in the upright position due to alignment problems. This often occurs after accidents, heavy impacts, or improper seat removal and installation.
Check the striker plate on the seatback for damage or misalignment. The striker should center properly in the latch mechanism when the seat is in the upright position. Bent strikers prevent secure latching and may require replacement.
Examine the seat frame mounting points for cracks or deformation. Damaged mounting points can cause the entire seat to sit at an angle, preventing proper latch engagement.
Advanced Troubleshooting Techniques
When standard repair procedures don’t solve your problem, these advanced techniques help identify less common issues.
Electrical System Check
Some Mazda 5 models include electrical components in the seat system, such as position sensors or heated seat elements. While these don’t directly affect the mechanical latch, damaged wiring can interfere with seat operation.
Inspect all electrical connections for corrosion, loose terminals, or damaged insulation. Disconnect the battery before working on any electrical components to prevent short circuits or accidental airbag deployment.
Test electrical continuity using a multimeter if you suspect wiring problems. Replace any damaged connectors or repair broken wires using appropriate automotive-grade materials.
Structural Damage Assessment
Severe impacts or accidents can damage the seat frame structure in ways that aren’t immediately obvious. Hidden structural damage often causes persistent latch problems that resist conventional repairs.
Remove the seat from the vehicle to inspect the frame thoroughly. Look for hairline cracks in welded joints, bent mounting brackets, or deformed tube sections. Pay special attention to areas around the latch mounting points and pivot mechanisms.
Minor frame damage might be repairable using appropriate welding techniques, but extensive damage typically requires seat replacement for safety reasons.
Factory Service Bulletin Review
Mazda occasionally issues service bulletins addressing known problems with specific model years or production runs. These bulletins often include updated repair procedures or improved replacement parts.
Contact your local Mazda dealership or search online databases for relevant service bulletins. Even if your vehicle is out of warranty, this information can guide your repair efforts and help prevent recurring problems.
Preventive Maintenance Tips
Regular maintenance prevents most latch problems and extends the life of your seat mechanisms.
Regular Cleaning Schedule
Clean your seat mechanisms every six months or more frequently if you frequently transport children or pets. Remove crumbs, dirt, and debris that can jam moving parts.
Use a vacuum cleaner with a narrow attachment to remove debris from tight spaces around the latch mechanism. Avoid using water or harsh chemicals that might damage plastic components or promote corrosion.
Lubrication Maintenance
Apply fresh grease to latch mechanisms annually or whenever you notice increased effort required for operation. Use only appropriate automotive lubricants – household oils can attract dirt and cause more problems.
During lubrication, operate the mechanism several times to distribute grease evenly across all surfaces. Wipe away excess grease to prevent dirt accumulation.
Proper Operation Techniques
Train all family members to operate seat mechanisms correctly. Avoid forcing stuck mechanisms or using excessive force during normal operation.
Support the seatback weight when folding or raising seats to reduce stress on the latch components. This simple practice significantly extends mechanism life and prevents premature wear.
Inspection During Routine Service
Include seat mechanism inspection in your regular vehicle maintenance routine. Check for proper operation, unusual noises, or developing problems during oil changes or other service intervals.
Early detection of problems allows for simple repairs before major component failure occurs. This proactive approach saves money and prevents inconvenient breakdowns.
When to Seek Professional Help
While most Mazda 5 latch problems are within the scope of DIY repair, certain situations require professional assistance.
Safety-Related Concerns
If you discover structural damage to the seat frame or mounting points, consult a qualified automotive technician immediately. Compromised seat structure poses serious safety risks during accidents.
Any problems with seatbelt components or anchoring points also require professional evaluation. These safety systems must function perfectly to protect occupants.
Complex Electrical Issues
Advanced electrical problems involving the vehicle’s computer systems or airbag components exceed typical DIY capabilities. Professional diagnostic equipment and specialized knowledge become necessary for safe repairs.
Warranty Considerations
If your vehicle remains under warranty, attempting DIY repairs might void coverage for related problems. Consult your warranty terms and consider professional service for newer vehicles.
Time and Tool Limitations
Some repairs require specialized tools or extensive disassembly that makes professional repair more cost-effective than DIY attempts. Consider your available time and tool access when deciding whether to tackle complex repairs yourself.
Cost Analysis and Parts Sources
Understanding repair costs helps you make informed decisions about DIY versus professional repair.
Typical Repair Costs
Simple cleaning and lubrication require minimal investment in materials – usually under $20 for cleaning supplies and grease. Basic hand tools add another $50-100 if you don’t already own them.
Component replacement costs vary significantly based on part availability and source. OEM parts from Mazda dealerships typically cost more but offer guaranteed compatibility and quality.
Aftermarket alternatives can provide significant savings but require careful research to ensure proper fit and function. Generic latch mechanisms might not match your specific model year requirements exactly.
Labor Cost Comparison
Professional repair shops typically charge 2-4 hours of labor for seat latch repairs, depending on problem complexity. At typical shop rates of $100-150 per hour, labor costs can exceed $300-600.
DIY repairs eliminate labor costs but require your time investment. Simple repairs take 1-2 hours, while complex component replacement might require a full weekend.
Parts Source Recommendations
Mazda dealerships offer the highest quality parts with guaranteed compatibility but at premium prices. This option works best for newer vehicles or complex problems requiring perfect fit.
Online automotive parts suppliers like RockAuto, AutoZone, or Advance Auto Parts offer competitive pricing on both OEM and aftermarket components. Research part numbers carefully to ensure compatibility.
Salvage yards provide cost-effective solutions for older vehicles where new parts are expensive or unavailable. Inspect used parts carefully for wear or damage before installation.
Conclusion
Repairing Mazda 5 middle row latch problems doesn’t require professional expertise in most cases. With proper diagnosis, appropriate tools, and patience, you can restore your seat mechanism to full functionality while saving significant money on repair costs.
Start with simple solutions like cleaning and lubrication before considering component replacement. Most latch problems stem from accumulated debris or dried lubricant rather than actual component failure.
Remember that seat mechanisms are safety-related components. When in doubt about structural integrity or proper repair procedures, consult qualified professionals. Your family’s safety depends on properly functioning seat systems.
Regular maintenance prevents most problems and extends component life significantly. Invest a few minutes every few months in basic cleaning and lubrication to avoid costly repair projects later.
The skills you develop fixing your Mazda 5 latch problems transfer to other automotive repair projects. Each successful repair builds confidence and mechanical knowledge that serves you well throughout your vehicle ownership experience.