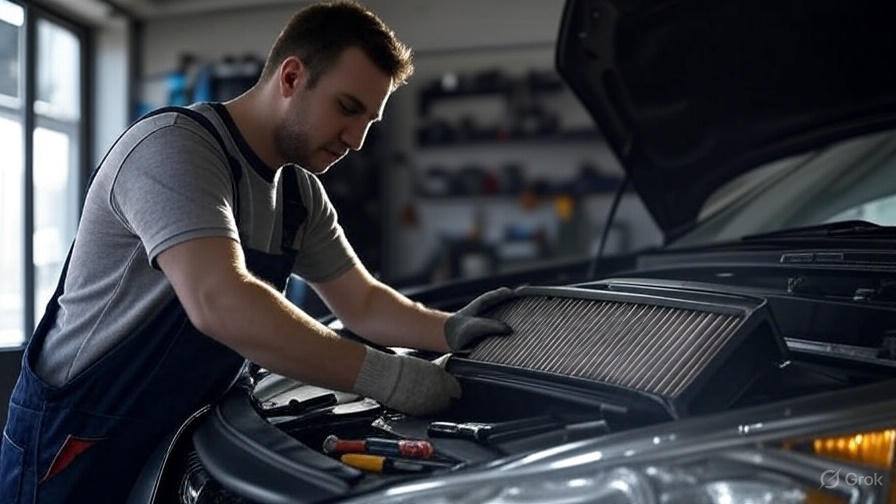
Your Honda Accord’s cabin air filter works tirelessly behind the scenes, cleaning the air that flows through your vehicle’s heating and cooling system. This small but crucial component traps dust, pollen, exhaust fumes, and other airborne particles before they enter your car’s interior. Most Honda Accord owners don’t think about their cabin filter until they notice reduced airflow from their vents or catch a whiff of musty odors.
Replacing your Honda Accord cabin air filter takes just 15-20 minutes and requires no special tools. This simple maintenance task can dramatically improve your driving experience while protecting your health and your vehicle’s HVAC system. Let’s walk through everything you need to know about changing your cabin air filter, from identifying the right part to completing the installation.
Why Your Honda Accord Cabin Air Filter Matters
The cabin air filter in your Honda Accord serves as the first line of defense against airborne contaminants. Every time you turn on your air conditioning, heating, or ventilation system, outside air passes through this filter before reaching your lungs. Without a properly functioning filter, you’d breathe in harmful particles, allergens, and pollutants during every drive.
A clean cabin air filter ensures optimal airflow through your HVAC system. When the filter becomes clogged with debris, your air conditioning works harder to push air through the restriction. This extra strain can lead to premature wear on your AC compressor and blower motor, resulting in expensive repairs down the road.
Your filter also plays a vital role in maintaining clear visibility. A dirty cabin filter can cause your windows to fog up more frequently because the HVAC system can’t effectively circulate air throughout the cabin. This fogging creates dangerous driving conditions, especially during rainy or humid weather.
Signs Your Honda Accord Needs a New Cabin Air Filter
Your Honda Accord will give you several clear signals when the cabin air filter needs replacement. Reduced airflow from your vents represents the most obvious symptom. If you notice that your air conditioning or heating system doesn’t blow as strongly as it used to, a clogged filter is likely the culprit.
Unpleasant odors coming from your vents indicate that your filter has reached its capacity for trapping contaminants. These smells might remind you of old socks, mildew, or general mustiness. The odors occur because trapped moisture and organic particles create an ideal breeding ground for bacteria and mold.
Increased window fogging happens when your HVAC system can’t properly dehumidify the cabin air. A severely clogged filter prevents adequate air circulation, leading to condensation on your windows even when you’re running the defogger.
Allergy symptoms that worsen while driving suggest that your cabin filter isn’t effectively removing pollen and other allergens from incoming air. If you find yourself sneezing more often or experiencing watery eyes during car trips, your filter probably needs attention.
Visible dirt and debris around your air vents points to a filter that’s no longer doing its job. When particles start bypassing the filter, they can settle on your dashboard and other interior surfaces.
Tools and Materials You’ll Need for the Job
Changing your Honda Accord cabin air filter requires minimal equipment. You won’t need any power tools or specialized automotive equipment for this straightforward maintenance task.
The only tool you might need is a flat-head screwdriver, depending on your specific Honda Accord model year. Some models use plastic clips that you can remove by hand, while others require a screwdriver to pop the clips free.
Your most important purchase will be the replacement cabin air filter itself. Honda genuine cabin air filters offer the best fit and filtration quality, but several aftermarket brands produce excellent alternatives at lower prices. Popular aftermarket options include FRAM, K&N, Mann-Filter, and Purolator.
When shopping for a replacement filter, you’ll need your Honda Accord’s year, make, and model information. Cabin air filters vary in size and shape between different model years, so double-check the part number to ensure compatibility.
A flashlight or work light will help you see clearly inside the glove compartment area where most Honda Accord cabin filters are located. Good lighting makes the installation process much easier and helps you avoid forcing parts that don’t fit properly.
Locating Your Honda Accord’s Cabin Air Filter
The cabin air filter location varies slightly depending on your Honda Accord’s model year, but most filters hide behind the glove compartment. This placement makes sense from an engineering perspective because it positions the filter in the path of incoming outside air before it reaches the HVAC system.
For Honda Accord models from 2003 to 2007, you’ll find the cabin air filter behind the glove box. The filter housing sits horizontally behind the passenger-side dashboard, accessible once you remove the glove compartment.
Honda Accord models from 2008 to 2012 also place the cabin filter behind the glove box, but the housing design changed slightly. The filter orientation and removal process remain similar to earlier models.
Newer Honda Accord models from 2013 onward continue to use the behind-glove-box location, but Honda improved the access mechanism. The filter housing includes easier-to-remove clips and clearer markings to guide the replacement process.
Some Honda Accord models include multiple cabin air filters. If your vehicle has dual-zone climate control, you might have two separate filters that need individual replacement. Check your owner’s manual to confirm how many filters your specific model uses.
Step-by-Step Filter Replacement Process
Start by parking your Honda Accord on level ground and engaging the parking brake. Turn off the engine and remove the keys from the ignition. You don’t need to disconnect the battery for this procedure, but turning off the HVAC system prevents the fan from running while you work.
Open the passenger-side door and locate the glove compartment. Remove all items from inside the glove box to prevent them from falling out during the removal process. Small items like pens, papers, and coins can easily get lost if they fall into the dashboard area.
Next, you’ll need to remove the glove compartment to access the cabin air filter housing. Look for the plastic pins or clips that hold the glove box in place. Most Honda Accord models use push-pins that you can remove by pressing the center portion down and then pulling the entire pin out.
Some models use plastic clips on the sides of the glove compartment. Gently squeeze these clips while pulling the glove box toward you. The glove compartment should swing down and out of the way, revealing the filter housing behind it.
Locate the cabin air filter housing, which typically appears as a rectangular plastic box with a removable cover. The housing might have arrows or other markings indicating the direction of airflow through the filter.
Remove the filter housing cover by pressing the plastic tabs or clips that hold it in place. The cover should lift or slide away easily without forcing. If you encounter resistance, double-check that you’ve released all the retaining clips.
Pull the old cabin air filter straight out of the housing. Pay attention to which direction the filter was installed – many cabin air filters have an airflow direction arrow that must point the correct way for proper function.
Before installing the new filter, take a moment to clean out any debris from the filter housing. Use a damp cloth or vacuum to remove leaves, dirt, or other particles that might have accumulated around the filter area.
Remove the new cabin air filter from its packaging and check for any installation instructions printed on the filter frame. Install the new filter in the same orientation as the old one, making sure any airflow arrows point in the correct direction.
Replace the filter housing cover, ensuring that all clips or tabs snap securely into place. The cover should sit flush against the housing without any gaps or misalignment.
Reinstall the glove compartment by reversing the removal process. Line up the plastic pins or clips with their corresponding holes and push them firmly into place. The glove compartment should fit snugly against the dashboard without rattling or moving.
Honda Accord Model-Specific Instructions
Different Honda Accord generations have slight variations in their cabin air filter replacement procedures. These differences mainly involve the glove compartment removal method and filter housing design.
For 2003-2007 Honda Accord models, the glove compartment uses a simple pin system. You’ll find four to six plastic pins around the perimeter of the glove box opening. Press the center of each pin to release it, then pull the entire pin out. The glove compartment will drop down, giving you access to the filter housing on the passenger side.
Honda Accord models from 2008-2012 feature a slightly different glove box design with improved clips. Instead of individual pins, these models use integrated plastic clips on the sides of the glove compartment. Squeeze the clips inward while pulling the glove box toward you to release it.
The 2013-2017 Honda Accord generation introduced tool-free glove compartment removal. These models use large plastic tabs that you can press by hand to release the glove box. The filter housing also includes better labeling to indicate proper filter orientation.
Newer Honda Accord models from 2018 onward maintain the user-friendly design but may include additional features like filter change reminder systems. These vehicles might display a maintenance message on the dashboard when the cabin air filter needs replacement.
Hybrid Honda Accord models follow the same general procedure as their gas-powered counterparts. The hybrid system doesn’t affect the cabin air filter location or replacement process, so you can use the same steps regardless of your powertrain.
Maintenance Schedule and Filter Types
Honda recommends replacing your Accord’s cabin air filter every 15,000 to 30,000 miles, depending on your driving conditions. City driving in dusty or polluted environments requires more frequent changes than highway driving in clean air conditions.
If you frequently drive on unpaved roads, through construction zones, or in areas with high pollen counts, consider changing your filter every 12,000 miles. These harsh conditions can clog your filter much faster than normal driving.
Standard particulate cabin air filters trap dust, pollen, and larger particles but don’t remove odors or gases. These basic filters cost less and work well for most driving situations.
Activated carbon cabin air filters include a layer of charcoal that absorbs odors and some gases. These filters cost more than standard filters but provide superior air quality, especially in urban driving conditions with heavy traffic.
HEPA-style cabin air filters offer the highest level of filtration, removing even microscopic particles from the incoming air. These premium filters work best for drivers with severe allergies or respiratory sensitivities.
Washable cabin air filters can be cleaned and reused multiple times before replacement. While these filters have a higher upfront cost, they can save money over time if you maintain them properly.
Troubleshooting Common Installation Issues
Sometimes the new cabin air filter doesn’t fit properly in the housing, even when you’ve purchased the correct part number. This usually happens when the filter gets compressed during shipping or storage. Gently reshape the filter frame to match the housing dimensions, being careful not to damage the filtering material.
If the filter housing cover won’t close properly after installing the new filter, check that the filter sits completely flat in the housing. Filters that aren’t fully seated can prevent the cover from closing and may allow unfiltered air to bypass the system.
Difficulty removing the old filter often indicates that it’s severely clogged or has absorbed moisture and expanded. Use gentle, steady pressure to work the filter loose, rather than yanking or forcing it out. If the filter tears during removal, make sure to remove all pieces before installing the new one.
Glove compartment alignment problems after reassembly usually mean that one or more of the retaining pins or clips didn’t seat properly. Remove the glove box again and ensure that all mounting points align correctly before pushing the fasteners into place.
Strange noises from the HVAC system after filter replacement might indicate that debris fell into the system during the installation process. Run the fan on high speed for a few minutes to blow out any loose particles that might be rattling around in the ductwork.
Cost Considerations and Money-Saving Tips
Genuine Honda cabin air filters typically cost between $20 and $35, depending on your specific model and where you purchase them. Honda dealerships usually charge the highest prices, while online retailers often offer significant savings on the same genuine parts.
Aftermarket cabin air filters can cost as little as $8 to $15 for basic models, with premium options reaching $25 to $30. Many aftermarket filters perform just as well as genuine Honda parts, making them an excellent value for budget-conscious owners.
Installing the cabin air filter yourself saves $30 to $60 in labor costs compared to having a dealership or service center perform the work. This simple DIY task pays for itself immediately and gives you the satisfaction of maintaining your own vehicle.
Buying cabin air filters in bulk can reduce the per-unit cost significantly. If you own multiple Honda vehicles or plan to keep your Accord for many years, purchasing several filters at once can save money in the long run.
Some auto parts stores offer customer loyalty programs that provide discounts on routine maintenance items like cabin air filters. Signing up for these programs can result in substantial savings over time.
Environmental Impact and Disposal
Proper disposal of your old cabin air filter helps protect the environment and keeps harmful particles out of landfills. Used cabin air filters contain trapped pollutants, dust, and potentially harmful microorganisms that shouldn’t be released back into the environment.
Most municipal recycling programs don’t accept used cabin air filters because of the mixed materials and contamination. However, some auto parts stores and service centers have take-back programs for used filters.
The filter frame, usually made of plastic or cardboard, can sometimes be recycled separately from the filtering material. Check with your local recycling center to see if they accept these components individually.
When disposing of cabin air filters in regular trash, seal them in a plastic bag to prevent trapped particles from becoming airborne. This simple step protects sanitation workers and prevents pollutants from returning to the environment.
Some newer cabin air filters use more environmentally friendly materials and construction methods. These eco-friendly options might cost slightly more but reduce the environmental impact of your vehicle maintenance routine.

Performance Benefits of Regular Filter Changes
A clean cabin air filter improves your Honda Accord’s fuel economy by reducing the load on your air conditioning system. When air flows freely through a clean filter, the AC compressor doesn’t work as hard to cool the cabin, resulting in better gas mileage during hot weather.
Your HVAC system components last longer when protected by a clean cabin air filter. The blower motor, evaporator core, and other expensive parts suffer less wear when they don’t have to work against the restriction of a clogged filter.
Interior air quality improves dramatically with regular filter changes. Clean filters remove more allergens, dust, and pollutants, creating a healthier environment for you and your passengers during every drive.
Reduced maintenance costs result from keeping your cabin air filter clean. A clogged filter can cause ice formation on the evaporator core, leading to water damage and expensive repairs to your vehicle’s interior components.
Better defrosting and defogging performance helps maintain safe driving conditions. Clean cabin air filters allow your HVAC system to quickly clear condensation from windows, improving visibility during inclement weather.
Conclusion
Changing your Honda Accord’s cabin air filter represents one of the easiest and most rewarding maintenance tasks you can perform yourself. This simple 15-minute job improves your air quality, protects your health, extends your HVAC system’s lifespan, and saves money on professional service costs.
Regular cabin air filter replacement keeps your Honda Accord running at peak performance while ensuring that every drive is comfortable and healthy. The small investment in a quality replacement filter pays dividends in improved air quality, better fuel economy, and reduced maintenance costs over your vehicle’s lifetime.
Don’t wait until you notice reduced airflow or unpleasant odors to change your cabin air filter. Make this simple maintenance task part of your regular vehicle care routine, and enjoy the benefits of clean, fresh air every time you drive your Honda Accord. Your lungs, your wallet, and your vehicle will thank you for this small but important act of preventive maintenance.


