Your car’s fabric ceiling, also known as the headliner, plays a crucial role in your vehicle’s interior aesthetics and comfort. When this overhead upholstery starts sagging, staining, or falling down, it creates an unsightly distraction that can affect your driving experience. Many car owners face this common problem, especially in older vehicles where the adhesive backing deteriorates over time.
The good news is that fixing a damaged headliner doesn’t require professional expertise or expensive tools. With the right materials and techniques, you can restore your car’s ceiling to its original condition. This comprehensive guide walks you through every step of the repair process, from identifying the problem to completing a professional-looking restoration.
Understanding Your Car’s Headliner System
The automotive headliner consists of three main components working together to create a smooth, attractive ceiling surface. The outer fabric layer provides the visible finish you see when looking up inside your vehicle. Behind this fabric sits a foam backing that gives the headliner its soft texture and helps with sound dampening. The rigid backing board, typically made of fiberglass or cardboard, provides structural support for the entire assembly.
Over time, heat, humidity, and age cause the adhesive bonding these layers to break down. This deterioration leads to the classic sagging headliner problem that plagues many older cars. Temperature fluctuations inside your vehicle accelerate this process, causing the fabric to separate from its backing and hang down in unsightly droops.
The foam layer often deteriorates first, crumbling into small particles that you might notice falling onto your seats or dashboard. Once this middle layer fails, the fabric loses its support and begins to sag. Understanding this structure helps you determine the best repair approach for your specific situation.
Identifying Different Types of Headliner Damage
Before starting any repair work, you need to assess the extent of damage to your car’s ceiling. Surface stains represent the mildest form of damage and often respond well to cleaning solutions without requiring complete replacement. These stains might result from spilled drinks, smoke residue, or general dirt accumulation over years of use.
Partial sagging occurs when small sections of the headliner begin separating from the backing board. You’ll notice areas where the fabric hangs lower than the surrounding surface, creating visible wrinkles or bubbles. This type of damage typically starts near the edges or around mounting points where stress concentrates.
Complete separation happens when large portions of the headliner fall away from the backing board. In severe cases, the entire fabric ceiling might hang down, obstructing your view and creating a safety hazard. This level of damage usually requires complete headliner replacement rather than spot repairs.
Water damage creates its own unique set of problems, often accompanied by discoloration, mold growth, or persistent odors. Moisture infiltration through sunroof seals, window gaskets, or roof damage can saturate the headliner materials, causing rapid deterioration of the adhesive bonds.
Essential Tools and Materials for Headliner Repair
Successful headliner repair depends on having the right tools and materials before you begin. Your basic tool kit should include a flat-head screwdriver for removing trim pieces, needle-nose pliers for handling small clips, and a razor blade or utility knife for cutting fabric and removing old adhesive residue.
Cleaning supplies form another essential category of materials. Gather microfiber cloths for gentle cleaning, a vacuum cleaner with brush attachments for removing loose debris, and appropriate cleaning solutions for your specific fabric type. Avoid harsh chemicals that might damage the remaining adhesive or cause additional staining.
For the actual repair work, you’ll need headliner adhesive spray, which comes in different formulations for various materials. Contact cement provides the strongest bond for complete replacements, while lighter spray adhesives work well for spot repairs. Some products offer extended working time, allowing you to reposition the fabric if needed.
If you’re replacing the entire headliner, you’ll need new fabric that matches your interior color and texture. Automotive upholstery shops carry headliner-specific materials, or you can order online from specialty suppliers. Measure your headliner board carefully to ensure you purchase enough material with some extra for trimming.
Preparing Your Vehicle for Headliner Repair
Start your repair project by removing all items from your car’s interior that might interfere with the work. Take out seat covers, floor mats, and any personal belongings. This preparation gives you clear access to the headliner and prevents damage to your possessions from falling debris or adhesive spray.
Next, disconnect your car’s battery to avoid electrical issues while working around interior lighting and electronic components. Many headliner repairs require removing dome lights, map lights, or other ceiling-mounted fixtures that connect to the vehicle’s electrical system.
Remove all trim pieces that attach to or overlap the headliner edges. This typically includes A-pillar covers, sun visor brackets, grab handles, and any decorative moldings. Store these pieces in labeled containers to avoid confusion during reassembly. Take photos before removal to help remember the correct orientation and placement of each component.
Clean the work area thoroughly by vacuuming loose debris and wiping down surrounding surfaces. Cover your seats and dashboard with plastic sheeting or old blankets to protect them from adhesive overspray and falling particles. Good preparation at this stage saves time and prevents frustration later in the process.
Step-by-Step Spot Repair Technique
For minor sagging or small damaged areas, spot repairs offer an effective solution without requiring complete headliner replacement. Begin by cleaning the affected area with a damp microfiber cloth to remove surface dirt and oils that might interfere with adhesive bonding. Allow the area to dry completely before proceeding.
Gently pull the sagging fabric back into position and examine the backing board surface. Remove any old adhesive residue or crumbling foam using a razor blade or scraper. The backing board should be clean and smooth for optimal adhesive bonding.
Apply headliner adhesive spray to both the fabric and the backing board surface. Follow the manufacturer’s instructions for application technique and drying time. Many products require a brief waiting period before pressing the surfaces together to achieve maximum bond strength.
Press the fabric firmly against the backing board, working from the center of the repair area outward to eliminate air bubbles. Use a clean cloth or roller to apply even pressure across the entire bonded area. Hold the fabric in position for several minutes to allow the adhesive to set properly.
Check the repair after 24 hours to ensure proper bonding. If you notice any edges lifting or incomplete adhesion, apply additional adhesive and repeat the pressing process. Small touch-ups are normal and don’t indicate repair failure.
Complete Headliner Replacement Process
When spot repairs won’t solve your headliner problems, complete replacement becomes necessary. Start by carefully removing the old fabric from the backing board. Use a razor blade to cut through stubborn adhesive connections, but avoid gouging or damaging the board surface.
Clean the backing board thoroughly by scraping away all old adhesive residue and foam particles. A wire brush helps remove stubborn deposits, while mineral spirits can dissolve adhesive remnants. The board surface must be completely clean for proper new fabric adhesion.
Lay your new headliner fabric face-down on a clean, flat surface. Position the backing board on top of the fabric, ensuring equal margins on all sides for trimming. Mark the board outline lightly with chalk or a removable marker.
Apply adhesive spray to the backing board surface in even, overlapping passes. Work in sections to maintain proper coverage without creating puddles or missed spots. Some adhesives require application to both surfaces, so check your product instructions carefully.
Carefully lower the backing board onto the fabric, starting from one end and working across to avoid trapping air bubbles. Press firmly and evenly across the entire surface, paying special attention to edges and corners where stress concentrates.
Trim excess fabric around the board perimeter, leaving about one inch for wrapping around the edges. Cut relief notches at corners to prevent bunching when the fabric wraps around the board thickness.
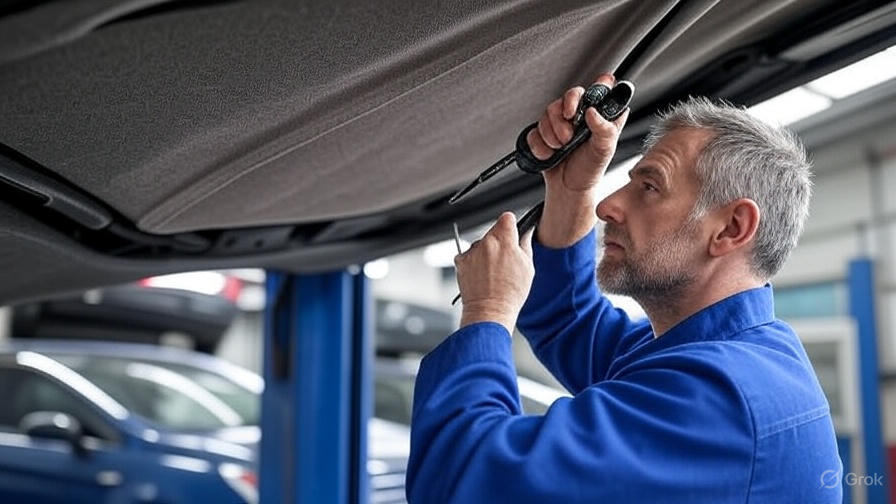
Installing the Repaired Headliner
With your headliner repair complete, installation reverses the removal process but requires careful attention to alignment and fit. Start by positioning the headliner assembly in the vehicle, ensuring proper orientation and alignment with mounting points and cutouts.
Install any ceiling-mounted fixtures like dome lights or map lights before final positioning. Thread the electrical connections through their respective openings and secure the fixtures according to manufacturer specifications. Test all electrical components before proceeding.
Position the headliner against the roof structure and begin installing trim pieces and mounting hardware. Work systematically around the perimeter, ensuring even pressure distribution and proper alignment. Don’t fully tighten any fasteners until all pieces are in position.
Replace sun visors, grab handles, and other accessories in their original positions. Check that all moving parts operate smoothly and don’t bind against the new headliner material. Make any necessary adjustments before final tightening.
Cleaning and Maintenance Tips
Regular maintenance extends your headliner’s life and prevents premature failure. Vacuum the ceiling surface monthly using a brush attachment to remove dust and debris that can act as abrasives against the fabric. Use gentle pressure to avoid loosening the adhesive bond.
Clean stains promptly using appropriate cleaning solutions for your fabric type. Blot rather than rub stains to prevent spreading or grinding dirt deeper into the material. Test any cleaning product on an inconspicuous area first to ensure it won’t cause discoloration or damage.
Control interior temperature and humidity when possible by using window shades and ventilating hot vehicles before driving. Extreme temperature cycles accelerate adhesive deterioration and fabric degradation. Park in shaded areas when available to reduce heat buildup.
Inspect your headliner regularly for early signs of separation or damage. Address small problems immediately before they spread and require more extensive repairs. Early intervention often allows for simple spot repairs instead of complete replacement.
Troubleshooting Common Repair Problems
Even with careful preparation and technique, headliner repairs sometimes encounter problems that require troubleshooting. Poor adhesion often results from contaminated surfaces, so ensure both fabric and backing board are completely clean before applying adhesive. Old wax, oils, or cleaning residues can prevent proper bonding.
Wrinkles or bubbles in the finished repair indicate trapped air or uneven adhesive application. If discovered immediately, you might be able to lift and reposition the fabric. After the adhesive sets, these imperfections usually require starting over with fresh materials.
Color matching problems become apparent after installation when the repair doesn’t blend with surrounding areas. This issue emphasizes the importance of obtaining proper replacement fabric before starting work. Automotive upholstery shops can often help match original materials.
Persistent odors after repair might indicate incomplete cleaning of the backing board or use of incompatible cleaning products. Some adhesives also produce strong odors that dissipate over time. Ensure adequate ventilation during and after the repair process.
When to Seek Professional Help
While many headliner repairs are within the scope of DIY projects, certain situations warrant professional assistance. Extensive water damage might require specialized drying equipment and mold remediation techniques beyond typical home capabilities. Professional restoration services have the tools and experience to handle these complex situations.
Classic or luxury vehicles often use specialized materials or construction techniques that require professional expertise. The cost of mistakes on these vehicles can exceed professional repair costs, making expert service a wise investment.
If your initial repair attempts fail or create additional problems, stop and consult a professional before causing further damage. Sometimes the cost of professional repair is less than the materials needed for multiple DIY attempts.
Modern vehicles with complex electronic systems integrated into the headliner area might require specialized knowledge to avoid damaging expensive components. Safety systems, sensors, or communication modules require careful handling during headliner work.
Cost Considerations and Budget Planning
Understanding the costs involved in headliner repair helps you make informed decisions about DIY versus professional repair options. Basic spot repair materials typically cost between $20 and $50, including adhesive spray and basic tools. This represents significant savings compared to professional repair costs.
Complete headliner replacement requires more investment, with fabric costs ranging from $30 to $100 depending on vehicle size and material quality. Add tool costs for first-time repairs, and total DIY expenses might reach $150 to $200 for a complete project.
Professional headliner replacement typically costs $200 to $600, depending on vehicle type and local labor rates. Luxury vehicles or those requiring specialized materials command higher prices. Compare these costs against your DIY investment and time commitment.
Factor in your time investment when calculating true repair costs. A first-time headliner replacement might require 6 to 8 hours over multiple days, including preparation, repair, and cleanup time. Consider whether this time investment makes sense for your situation.
Your car’s fabric ceiling repair doesn’t have to be an intimidating project. With proper preparation, the right materials, and careful attention to technique, you can restore your headliner to like-new condition. Take your time, follow the steps outlined in this guide, and don’t hesitate to seek help when needed. A successful headliner repair improves your vehicle’s appearance, comfort, and resale value while providing the satisfaction of completing a challenging DIY project.