Your Hyundai key fob battery has died at the worst possible moment. You’re standing next to your car, pressing the unlock button repeatedly, but nothing happens. This frustrating scenario affects thousands of Hyundai owners every year, yet most people don’t realize how simple it is to replace the battery themselves.
The good news? You can replace your Hyundai key fob battery in less than five minutes with basic tools you probably already have at home. This comprehensive guide walks you through the entire process, covers different Hyundai key fob models, and helps you avoid common mistakes that could damage your remote.
Signs Your Hyundai Key Fob Battery Needs Replacement
Your key fob gives you several warning signs before the battery dies completely. The most obvious indicator is reduced range – you’ll notice you need to get closer to your vehicle for the remote to work. Initially, your key fob might work from 30 feet away, but as the battery weakens, this distance shrinks to just a few feet.
Intermittent operation represents another clear sign. Your remote might work perfectly one day, then fail to respond the next. You’ll find yourself pressing buttons multiple times before getting a response, or the LED light on your key fob will appear dimmer than usual.
Some newer Hyundai models display a low battery warning message on the dashboard. This convenient feature appears when your key fob battery drops below a certain voltage level. However, don’t wait for this warning – proactive replacement prevents you from getting locked out.
The panic button often stops working first since it requires more power than other functions. If your panic alarm won’t activate but other buttons still work, battery replacement should be your next step.
Tools and Materials You’ll Need
Before starting the battery replacement process, gather these essential items:
A small flathead screwdriver or plastic prying tool works best for opening most Hyundai key fobs. Plastic tools prevent scratches and damage to the housing, but a small jeweler’s screwdriver serves as an excellent alternative.
You’ll need the correct replacement battery, typically a CR2032 coin cell battery for most Hyundai key fobs. Some older models use CR2025 or CR1616 batteries, so check your current battery before shopping. These batteries cost between $2-5 and are available at grocery stores, pharmacies, and electronic retailers.
A clean, well-lit workspace helps prevent losing small parts. Key fob components are tiny and easy to misplace, so work over a towel or tray to catch any falling pieces.
Have a pen and paper ready to make notes about how parts fit together. While the process is straightforward, taking a quick photo of the internal layout with your phone can save time during reassembly.
Identifying Your Hyundai Key Fob Type
Hyundai has used several different key fob designs over the years, and the battery replacement method varies slightly between models. Most fall into three main categories:
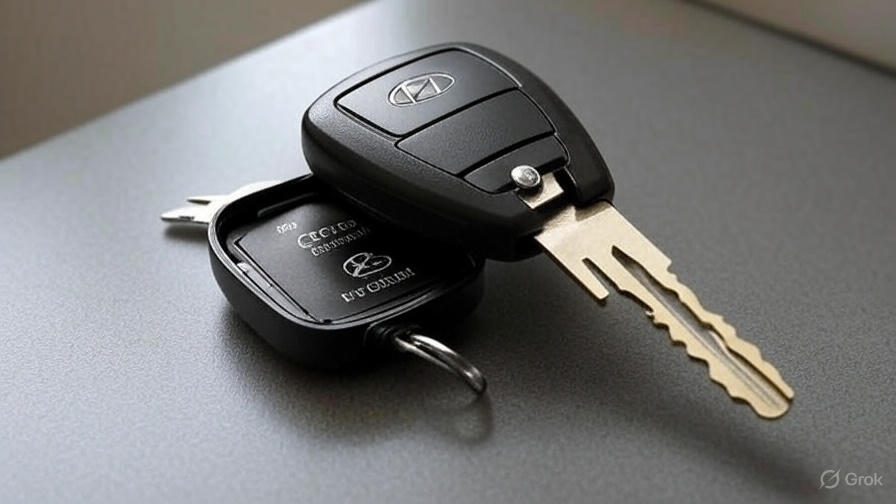
Flip Key Style: These key fobs have a physical key that folds into the remote housing. Popular on models from 2010-2018, they typically feature three or four buttons and use CR2032 batteries.
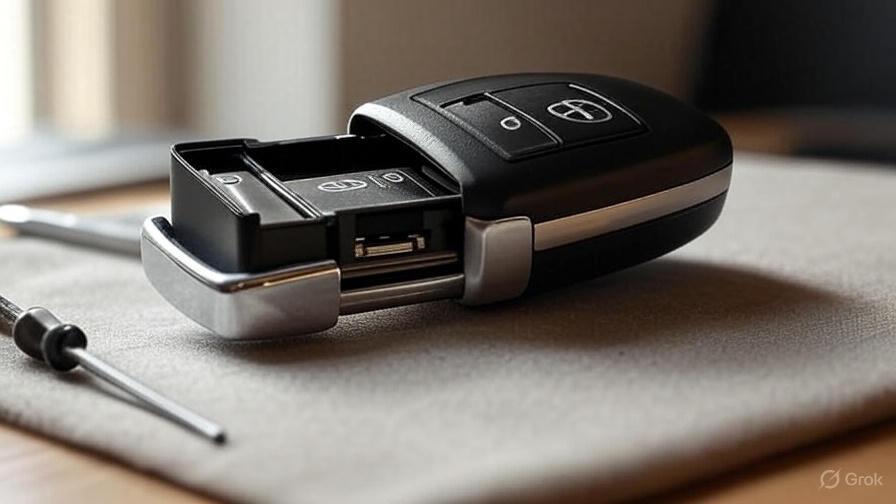
Smart Key: Modern Hyundai vehicles often come with smart keys that don’t require insertion into the ignition. These rectangular remotes have rounded edges and usually contain CR2032 batteries.
Traditional Remote: Older Hyundai models use separate key and remote combinations. The remote portion is typically smaller and may use CR2025 batteries.
Look for model numbers printed on the back of your key fob. Common Hyundai key fob part numbers include OSLOKA-310T, OSLOKA-875T, and TQ8-FOB-4F09. These numbers help identify the exact battery type and replacement procedure for your specific remote.
Step-by-Step Battery Replacement Process
Opening the Key Fob Housing
Start by locating the seam where the key fob’s two halves meet. Most Hyundai key fobs have a small notch or groove along this seam that indicates the separation point.
Insert your plastic prying tool or small flathead screwdriver into this notch. Apply gentle, steady pressure to separate the housing halves. Work your way around the seam gradually rather than forcing the tool in one spot, which could crack the plastic.
For flip-key models, you may need to remove the physical key first by pressing the release button and sliding the key out. This action often reveals additional access points for opening the housing.
Some key fobs have small clips or tabs that hold the halves together. These tabs require gentle pressure to release – forcing them can break the clips permanently.
Removing the Old Battery
Once you’ve opened the key fob, locate the battery compartment. The old battery sits in a small holder, usually secured by a metal clip or plastic tab.
Note the battery’s orientation before removing it. The positive (+) side typically faces up, but some models have the negative (-) side facing up. Taking a photo at this stage prevents confusion during installation.
Use your fingernail or a plastic tool to lift the battery out of its compartment. Avoid using metal tools that could damage the battery contacts or circuit board.
If the battery seems stuck, gently rock it back and forth while lifting. Old batteries sometimes develop a slight corrosion residue that makes removal more difficult.
Installing the New Battery
Clean the battery compartment with a dry cloth before installing the new battery. Remove any dust or debris that might prevent proper contact.
Place the new battery in the compartment with the same orientation as the old one. The battery should sit flush in its holder without forcing or bending the contacts.
Press down gently to ensure the battery makes solid contact with both positive and negative terminals. A loose connection will cause intermittent operation or complete failure.
Check that no part of the circuit board or other components are pinched under the battery. This mistake can damage the key fob’s internal electronics.
Reassembling the Key Fob
Align the two housing halves carefully before pressing them together. The plastic should fit together smoothly without gaps or misalignment.
Press firmly around the entire perimeter to ensure all clips and tabs engage properly. You should hear small clicking sounds as the housing snaps together.
If the halves don’t close easily, don’t force them. Open the key fob again and check for any components that might be out of place or preventing proper closure.
For flip-key models, reinsert the physical key and test that it operates smoothly. The key should fold and unfold without binding or resistance.
Testing Your Key Fob After Battery Replacement
Before celebrating your successful repair, test all key fob functions to ensure everything works correctly.
Start by testing the unlock button while standing close to your vehicle. You should see the door locks respond and hear the confirmation chirp.
Test the lock button next, then try the trunk release and panic buttons if your key fob has these features. Each function should respond immediately without multiple button presses.
Walk away from your vehicle gradually while testing the remote’s range. A fresh battery should restore the original operating distance, typically 30-50 feet depending on your specific model.
If any functions don’t work properly, open the key fob again and check the battery orientation and contact points. Sometimes the battery needs a slight adjustment to make proper contact.
Troubleshooting Common Issues
Key Fob Still Doesn’t Work: If your key fob remains unresponsive after battery replacement, the issue might be more than just a dead battery. Try reprogramming the remote using your vehicle’s specific procedure, usually found in the owner’s manual.
Reduced Range: New batteries should restore full operating range. If your key fob still has limited range, check for interference from other electronic devices or consider that the key fob’s internal circuitry might be failing.
Intermittent Operation: This problem often indicates poor battery contact. Remove the battery and gently clean the contact points with a pencil eraser, then reinstall the battery ensuring proper seating.
Housing Won’t Close Properly: Don’t force the housing together. Open it again and verify that all internal components are properly positioned and the battery isn’t preventing closure.
LED Light Not Working: Some key fobs have indicator lights that should flash when buttons are pressed. If the light doesn’t work after battery replacement, the LED itself might be burned out, requiring professional repair.
Extending Your Key Fob Battery Life
Simple habits can significantly extend your key fob battery’s lifespan. Avoid carrying your key fob in pockets with other electronic devices like smartphones, which can cause interference and drain the battery faster.
Keep your key fob away from extreme temperatures. Leaving it in a hot car or exposing it to freezing conditions reduces battery life. Room temperature storage provides optimal battery performance.
Don’t press buttons unnecessarily. Each button press consumes battery power, so avoid fidgeting with your key fob or accidentally activating it while in your pocket or purse.
Clean your key fob regularly with a slightly damp cloth to remove dirt and debris that might interfere with button operation. Dirty buttons require more pressure to activate, potentially draining the battery faster.
When to Seek Professional Help
While battery replacement is typically a DIY project, certain situations require professional assistance. If your key fob housing is cracked or damaged, attempting to open it might cause further damage.
Water damage presents another scenario where professional help is advisable. If your key fob has been exposed to water, simply replacing the battery might not solve all problems. Corrosion on the circuit board requires specialized cleaning and potentially component replacement.
Some newer Hyundai models use advanced smart keys with additional security features that require programming after battery replacement. If your key fob doesn’t work after following all troubleshooting steps, your Hyundai dealer can reprogram it and verify proper operation.
Key fobs that have been physically damaged, dropped repeatedly, or subjected to excessive force might have internal component damage beyond battery issues. Professional diagnosis can determine whether repair or replacement is more cost-effective.
Cost Comparison: DIY vs Professional Service
Replacing your Hyundai key fob battery yourself costs between $2-5 for the battery plus a few minutes of your time. This represents significant savings compared to dealer service, which typically charges $50-80 for the same battery replacement.
Even independent repair shops usually charge $20-30 for key fob battery replacement, making DIY the clear winner from a cost perspective. The tools needed for the job cost less than one professional service call and can be used for future battery replacements.
However, consider professional service if you’re uncomfortable with small electronic repairs or if your key fob requires reprogramming after battery replacement. The peace of mind and warranty coverage might justify the additional cost for some owners.
Preventive Maintenance Tips
Replace your key fob battery proactively every 2-3 years rather than waiting for it to die. This prevents the inconvenience of being locked out and ensures consistent performance.
Keep a spare battery in your glove compartment or at home. CR2032 batteries have a long shelf life and cost very little, making this a practical backup plan.
Consider replacing batteries in all your key fobs at the same time if you have multiple remotes. This approach simplifies maintenance and ensures all your remotes have fresh batteries.
Create a reminder in your phone or calendar to check key fob battery levels annually. This proactive approach prevents unexpected failures and maintains your vehicle’s security and convenience features.
Environmental Considerations
Dispose of old key fob batteries properly through recycling programs at electronics stores or municipal waste facilities. These batteries contain materials that shouldn’t enter landfills but can be recycled effectively.
Many retailers that sell batteries also accept used batteries for recycling. This convenient option makes responsible disposal easy and accessible.
Buy batteries from reputable manufacturers to ensure quality and longevity. Cheap batteries might save money initially but often fail sooner, creating more waste and requiring more frequent replacements.
Conclusion
Changing a battery in your Hyundai key fob is a simple maintenance task that saves money and prevents inconvenient lockouts. With basic tools and five minutes of your time, you can restore your key fob to full functionality and extend its useful life.
The process works the same way for most Hyundai models, though slight variations exist between different key fob designs. Following the steps outlined in this guide ensures successful battery replacement while avoiding common mistakes that could damage your remote.
Regular maintenance and proactive battery replacement keep your Hyundai’s security and convenience features working reliably. The small investment in a replacement battery pays dividends in continued convenience and peace of mind.
Remember that key fob technology continues evolving, and newer models might have additional features or requirements. When in doubt, consult your owner’s manual or contact your Hyundai dealer for model-specific guidance. With proper care and timely battery replacement, your key fob will provide years of reliable service.