Your engine starts consuming oil faster than usual. Blue smoke billows from the exhaust pipe during startup. The telltale signs point to one culprit: worn valve seals. These small but critical components keep engine oil from leaking into the combustion chamber, and when they fail, your engine performance suffers dramatically.
Installing new valve seals can restore your engine’s efficiency and stop that annoying oil consumption. This comprehensive guide walks you through the entire process, from identifying the problem to completing the installation like a professional mechanic.
What Are Valve Seals and Why Do They Matter?
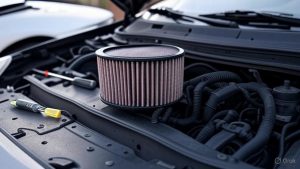
Valve seals are small rubber or synthetic components that sit on top of valve guides in your engine’s cylinder head. These seals prevent engine oil from flowing down the valve stems into the combustion chamber. When valve seals work properly, they allow just enough oil to lubricate the valve stems while keeping excess oil out of the cylinders.
The engine relies on precise oil control for optimal performance. Too much oil in the combustion chamber creates carbon deposits, reduces compression, and causes excessive emissions. Worn or damaged valve seals disrupt this delicate balance and lead to various engine problems.
Modern engines use different types of valve seals depending on the application. Umbrella seals cover the entire valve stem, while positive seals create a tighter fit around specific areas of the valve guide. Both designs serve the same purpose: controlling oil flow and maintaining proper engine operation.
Signs Your Valve Seals Need Replacement
Recognizing valve seal failure early saves you from more extensive engine damage. Several symptoms indicate it’s time to replace these critical components.
Blue smoke from the exhaust represents the most obvious sign of valve seal problems. This smoke appears most noticeably during cold starts when oil has had time to seep past worn seals. The smoke typically diminishes after the engine warms up, but returns during deceleration or after the engine sits idle.
Excessive oil consumption without visible leaks suggests internal oil burning caused by faulty valve seals. Your engine may consume a quart of oil every 1,000 miles or less, forcing frequent top-offs between oil changes.
Poor engine performance often accompanies valve seal failure. Carbon deposits from burning oil reduce compression and cause misfiring, rough idling, and decreased power output. The engine may also produce unusual noises or vibrations during operation.
Spark plug fouling provides another indicator of valve seal problems. Oil entering the combustion chamber coats spark plug electrodes, causing misfires and poor ignition. Fouled plugs appear wet and dark, requiring frequent replacement to maintain engine performance.
Tools and Materials You’ll Need
Proper preparation ensures a smooth valve seal installation process. Gather all necessary tools and materials before starting the job to avoid interruptions.
Essential Tools:
- Socket wrench set with various sizes
- Torque wrench for precise tightening
- Valve spring compressor tool
- Magnetic parts tray for small components
- Clean shop rags and degreaser
- Compressed air source
- Valve seal installation tool
- Feeler gauges for measurements
- Digital camera for reference photos
Required Materials:
- New valve seals (complete set for your engine)
- Fresh engine oil and filter
- New valve cover gasket
- Thread locker compound
- Carburetor cleaner or brake cleaner
- Shop towels and disposable gloves
Safety Equipment:
- Safety glasses to protect your eyes
- Work gloves for handling parts
- Well-ventilated workspace
- Fire extinguisher nearby when using solvents
Quality tools make the job easier and produce better results. Invest in a good valve spring compressor designed for your engine type. Universal compressors often lack the precision needed for professional-quality work.
Step-by-Step Installation Process
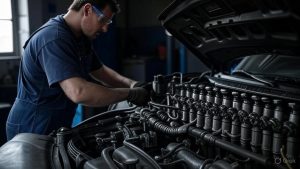
Preparation and Engine Access
Start by disconnecting the battery negative terminal to prevent electrical accidents. Allow the engine to cool completely if it was recently running. Hot engine components can cause serious burns and make handling difficult.
Remove the engine cover and air intake components to access the valve cover. Take photos of wire routing and component positions before disconnecting anything. These reference images prove invaluable during reassembly.
Drain the engine oil completely and replace the oil filter. This prevents contaminated oil from circulating through your freshly serviced engine. Clean oil also makes it easier to spot any leaks after completing the installation.
Label all vacuum lines and electrical connections before removal. Use masking tape and a permanent marker to create clear identification tags. This simple step prevents confusion and wiring mistakes during reassembly.
Removing the Valve Cover
Carefully disconnect all components attached to the valve cover, including spark plug wires, vacuum lines, and breather hoses. Some engines require removing the intake manifold or other components for adequate access.
Remove valve cover bolts in a crisscross pattern to prevent warping. Store bolts in a magnetic tray to prevent loss. Clean the valve cover mounting surface thoroughly, removing all traces of old gasket material.
Inspect the valve cover for cracks or damage while it’s removed. Aluminum covers may develop hairline cracks that cause oil leaks. Replace damaged covers to ensure proper sealing after installation.
Accessing the Valve Train
Rotate the engine to position the camshaft lobes away from the valves you’re servicing. This relieves spring pressure and makes valve spring compression easier. Use the crankshaft pulley bolt to rotate the engine manually.
Remove the camshaft or rocker arms if necessary to access valve springs. Some engines allow valve spring compression without removing these components, while others require complete disassembly of the valve train.
Keep all removed components organized and clean. Small parts like valve keepers disappear easily, so use magnetic trays and labeled containers. Clean each component thoroughly before reassembly to prevent contamination.
Compressing Valve Springs
Install your valve spring compressor according to the manufacturer’s instructions. Different engine designs require specific compressor configurations for safe operation. Never attempt to compress springs without proper tooling.
Apply steady pressure to compress the valve spring until you can remove the valve keepers. These small tapered pieces lock the valve spring retainer in place. Handle keepers carefully, as they’re easy to drop and difficult to find.
Slowly release spring tension once keepers are removed. The spring and retainer will come free, exposing the valve seal underneath. Inspect springs for cracks or excessive wear while they’re removed.
Removing Old Valve Seals
Old valve seals may stick to the valve guide or valve stem. Use a seal removal tool or small pry bar to carefully work them free. Avoid scratching the valve guide surface, as damage here affects seal performance.
Some seals require removal from the top of the valve guide, while others pull off the bottom. Consult your service manual for the correct removal method for your specific engine design.
Clean the valve guide thoroughly after seal removal. Use carburetor cleaner and a small brush to remove carbon deposits and old seal residue. A clean surface ensures proper new seal installation and sealing.
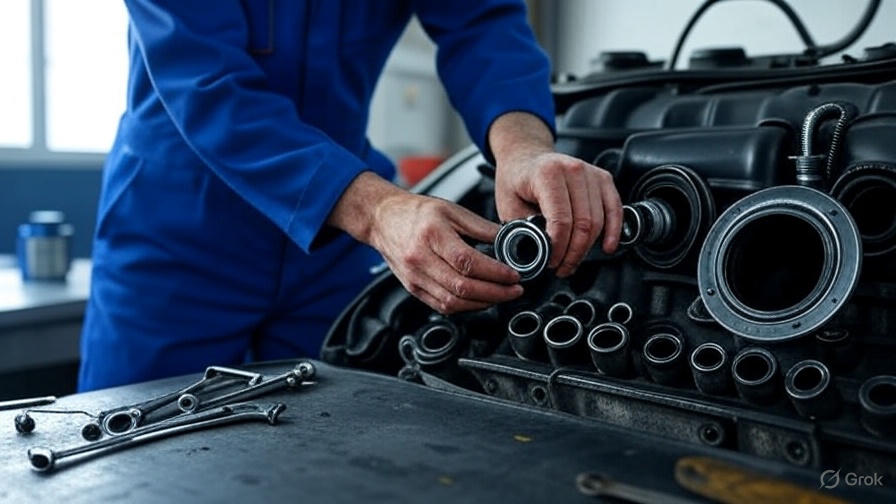
Installing New Valve Seals
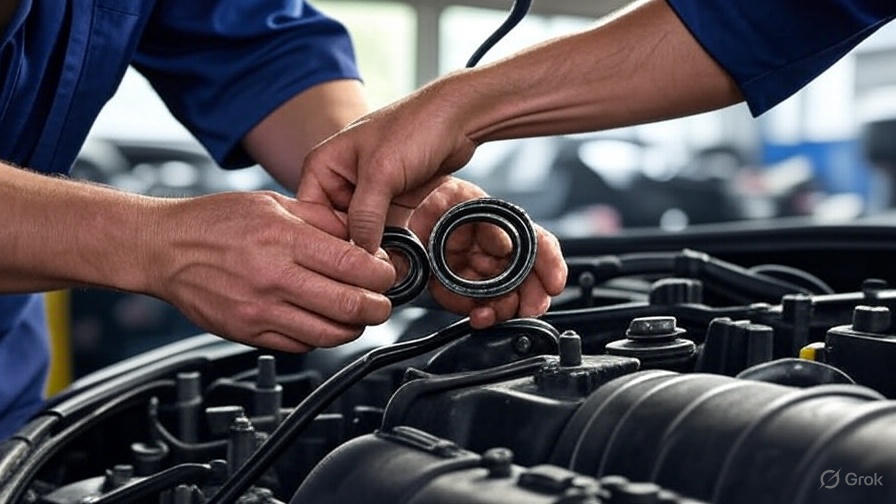
Inspect new seals carefully before installation. Check for cuts, tears, or manufacturing defects that could cause premature failure. Quality seals feel firm and flexible without any visible damage.
Lubricate new seals lightly with clean engine oil to ease installation. This prevents tearing during installation and helps seals seat properly on valve guides. Use only a thin film of oil to avoid contamination.
Install seals using the proper installation tool for your engine. These tools ensure seals seat at the correct depth and orientation. Hand installation often results in damaged seals or improper seating.
Push seals firmly into place until they bottom out on the valve guide. The seal should sit flush and square on the guide surface. Crooked or partially seated seals will leak and require reinstallation.
Reassembling the Valve Train
Install valve springs and retainers in reverse order of removal. Ensure springs sit properly in their pockets and retainers align correctly with valve stems. Misaligned components can cause valve binding or premature wear.
Compress springs carefully to install valve keepers. These small components must seat fully in their grooves on the valve stem. Partially seated keepers can slip during engine operation, causing catastrophic valve damage.
Double-check keeper installation before releasing spring pressure. Keepers should sit evenly around the valve stem with no gaps or misalignment. Take your time with this critical step to prevent future problems.
Final Assembly and Testing
Replace the valve cover gasket with a new one to prevent oil leaks. Apply a thin bead of RTV silicone to areas specified in your service manual. Too much sealant can squeeze into oil passages and cause blockages.
Torque valve cover bolts to specification in the recommended sequence. Over-tightening can warp the cover or damage the gasket, while under-tightening allows oil leaks. Use a torque wrench for accurate results.
Reconnect all previously removed components in reverse order of disassembly. Refer to your reference photos to ensure correct routing and connections. Double-check all connections before starting the engine.
Post-Installation Procedures
Fill the engine with fresh oil and install a new oil filter. Use the oil viscosity recommended by the manufacturer for optimal seal performance. Cheap oil can cause premature seal failure, so invest in quality lubricants.
Start the engine and allow it to idle for several minutes while monitoring for leaks. Listen for unusual noises that might indicate assembly problems. Normal ticking sounds from the valve train should diminish as oil circulates and components settle.
Check oil level after the initial run and add as necessary. New seals may seep slightly until they seat properly, so monitor oil consumption closely for the first few hundred miles. Excessive consumption indicates installation problems that require immediate attention.
Take the vehicle for a short test drive to verify proper operation. Monitor exhaust smoke, engine performance, and oil pressure during the drive. Blue smoke or rough running suggests problems that need investigation.
Common Mistakes to Avoid
Using the wrong seal type ranks as the most common installation error. Engines use specific seal designs and materials for different applications. Generic or incorrect seals often fail prematurely or cause immediate leakage problems.
Improper installation depth affects seal performance significantly. Seals installed too deep may not contact the valve stem properly, while shallow installation can cause seal extrusion or damage. Always use proper installation tools and follow manufacturer specifications.
Contamination during installation leads to premature seal failure. Keep work areas clean and use fresh, clean oil for lubrication. Dirt or debris on seals or valve guides creates leak paths that compromise seal integrity.
Reusing old valve springs or keepers saves money initially but often costs more in the long run. Worn springs don’t maintain proper valve control, while damaged keepers can fail catastrophically. Replace questionable components during seal installation.
Ignoring torque specifications causes various problems from oil leaks to component damage. Use a calibrated torque wrench and follow manufacturer recommendations exactly. Guess work leads to expensive mistakes and repeat repairs.
Maintenance Tips for Longer Seal Life
Regular oil changes represent the most important factor in valve seal longevity. Fresh oil contains additives that keep seals flexible and prevent hardening. Extended oil change intervals allow acids and contaminants to attack seal materials.
Using quality oil filters prevents contamination that damages seals over time. Cheap filters may allow particles to circulate that score valve guides and create leak paths. Invest in name-brand filters designed for your engine.
Maintaining proper engine operating temperature prevents seal damage from overheating. Check cooling system components regularly and repair problems promptly. Overheated engines often suffer multiple seal failures simultaneously.
Avoiding excessive engine RPM reduces stress on valve train components including seals. High RPM operation increases valve spring forces and heat generation that can damage seals prematurely. Drive conservatively for maximum component life.
Cost Considerations and Professional vs. DIY
Valve seal replacement costs vary widely depending on engine design and labor rates. Simple overhead cam engines might cost $300-500 for professional installation, while complex V-engines can exceed $1,500. DIY installation saves labor costs but requires proper tools and experience.
Consider your skill level honestly before attempting this repair. Valve timing errors or assembly mistakes can cause expensive engine damage that far exceeds professional repair costs. Complex engines often require special tools that cost more than professional installation.
The time investment for DIY installation ranges from 6-12 hours depending on engine complexity and your experience level. Factor in potential complications and the need to repeat steps if mistakes occur. Professional shops complete the work in 2-4 hours with proper equipment.
Conclusion
Installing valve seals requires patience, proper tools, and attention to detail, but the rewards include restored engine performance and eliminated oil consumption. This repair extends engine life significantly while improving fuel economy and reducing emissions.
Success depends on careful preparation, using quality parts, and following proper procedures. Take your time with each step and don’t hesitate to consult professional help if you encounter problems beyond your skill level.
Fresh valve seals transform a smoking, oil-burning engine into a clean-running powerplant that provides years of reliable service. The investment in time and parts pays dividends in improved performance and reduced operating costs.
Regular maintenance and quality oil keep new seals functioning properly for many years. By following the procedures outlined in this guide, you’ll complete a professional-quality installation that restores your engine to like-new condition.