Your car’s brake system depends heavily on properly functioning brake calipers. When these critical components start to fail, you face reduced braking performance, fluid leaks, and potential safety hazards. Rebuilding brake calipers offers a cost-effective alternative to purchasing expensive replacement units while ensuring your vehicle maintains optimal stopping power.
This comprehensive guide walks you through the entire brake caliper rebuild process, from identifying when your calipers need attention to completing the final installation. You’ll learn essential techniques, discover common pitfalls to avoid, and gain the confidence to tackle this important maintenance task.
Signs Your Brake Caliper Needs Rebuilding
Brake calipers rarely fail without warning. Several telltale signs indicate when your calipers require attention. Brake fluid leaks around the caliper housing represent the most obvious symptom. These leaks typically appear as dark, oily spots on your garage floor or driveway beneath the wheels.
Uneven brake pad wear patterns signal caliper problems. When one brake pad wears significantly faster than its counterpart, the caliper likely isn’t applying pressure evenly. This uneven wear reduces braking efficiency and creates dangerous driving conditions.
Spongy brake pedal feel often stems from compromised caliper seals. Air enters the brake system through damaged seals, creating a soft, mushy pedal that requires excessive pressure to engage the brakes. This condition demands immediate attention to prevent brake failure.
Grinding noises during braking indicate severe caliper malfunction. When calipers stick or fail to release properly, brake pads remain in constant contact with rotors, creating excessive heat and noise. This condition rapidly destroys brake components and compromises vehicle safety.
Vehicle pulling to one side during braking suggests caliper imbalance. When one caliper applies more pressure than its opposite counterpart, the vehicle naturally pulls toward the side with greater braking force. This pulling creates unpredictable handling and increases accident risk.
Essential Tools and Materials for Caliper Rebuilding
Successful brake caliper rebuilding requires specific tools and high-quality materials. Professional-grade brake caliper rebuild kits contain all necessary seals, gaskets, and hardware for complete restoration. These kits include rubber boots, piston seals, bleeder valve caps, and retaining clips designed specifically for your vehicle’s make and model.
A comprehensive tool collection ensures efficient work progress. You’ll need a complete socket set with both metric and standard sizes, brake caliper pistons tools for piston removal, and brake fluid catch containers to prevent environmental contamination. High-quality brake cleaner removes stubborn deposits and prepares surfaces for seal installation.
Specialized equipment makes the job safer and more efficient. A brake caliper press simplifies piston removal without damaging components. Torque wrenches ensure proper fastener tightness according to manufacturer specifications. Safety glasses and nitrile gloves protect against harmful chemicals and sharp edges.
Quality brake fluid matching your vehicle’s specifications is crucial. DOT 3, DOT 4, and DOT 5.1 fluids offer different performance characteristics and cannot be mixed. Consult your owner’s manual to determine the correct fluid type for your specific vehicle.
Removing the Brake Caliper Safely
Begin caliper removal by securing your vehicle on level ground. Engage the parking brake and place wheel chocks behind the rear wheels. Jack up the vehicle and support it with jack stands rated for your car’s weight. Never rely solely on hydraulic jacks for support during brake work.
Remove the wheel to access the brake caliper assembly. Locate the brake line connection and carefully disconnect it using the appropriate flare nut wrench. Brake lines use special fittings that require specific tools to prevent damage. Allow brake fluid to drain into a suitable container rather than letting it spill onto the ground.
Unbolt the caliper from its mounting bracket. Most calipers attach with two bolts that thread into the steering knuckle or suspension component. Apply penetrating oil to stubborn bolts and allow time for the lubricant to work. Use the correct socket size to prevent bolt head damage.
Support the caliper weight during removal to prevent brake line damage. Even with the brake line disconnected, residual fluid and caliper weight can strain connections and cause costly damage. Work methodically and maintain control throughout the removal process.
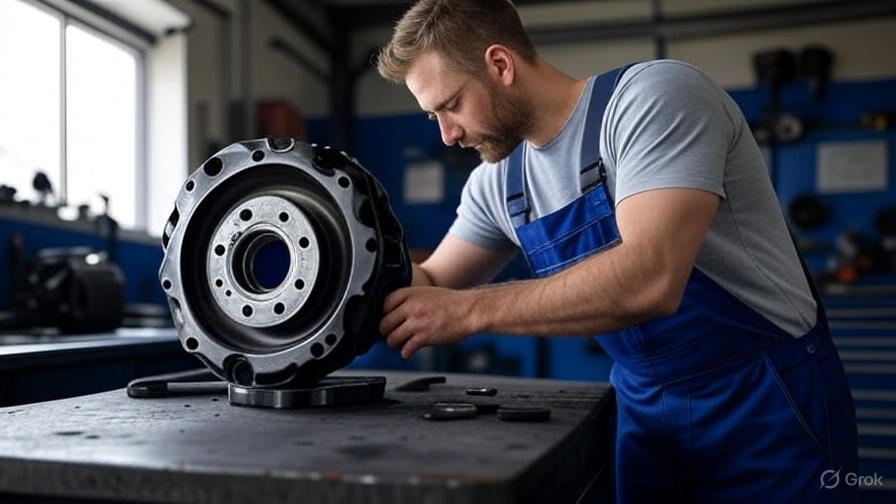
Disassembling the Caliper Components
Place the removed caliper in a clean workspace with adequate lighting. Remove the brake caliper dust boot first, taking note of its orientation and attachment method. Some boots simply pull off, while others require careful prying with appropriate tools.
Extract the caliper piston using compressed air or a specialized removal tool. Direct compressed air into the brake fluid inlet while covering the piston with a rag to control its movement. The piston should slide out smoothly without binding or tilting. If the piston resists removal, apply brake fluid around its edges to improve lubrication.
Remove the piston seal from its groove using a plastic pick or similar non-metallic tool. Metal tools can scratch the caliper bore and create leak paths for the new seal. Work carefully around the entire seal groove to ensure complete removal without damaging the aluminum or steel surfaces.
Inspect all removed components for damage, wear, or corrosion. Document your findings with photos or notes to reference during reassembly. This inspection phase helps identify additional problems that might require attention beyond basic seal replacement.

Cleaning and Inspecting Caliper Components
Thorough cleaning is essential for successful caliper rebuilding. Use brake parts cleaner to remove all traces of old brake fluid, dirt, and corrosion from caliper bores and piston surfaces. Pay special attention to seal grooves where contaminants often accumulate and prevent proper seal seating.
Inspect the caliper bore for scoring, pitting, or corrosion damage. Minor surface imperfections can often be polished out using fine abrasive compounds specifically designed for brake components. Deep scratches or significant corrosion may require professional machining or complete caliper replacement.
Examine the piston for damage, wear, or deformation. Pistons must be perfectly round and smooth to seal properly against new rubber components. Chrome-plated pistons should show no peeling or corrosion, while steel pistons need smooth, rust-free surfaces.
Check caliper mounting surfaces and bolt holes for damage or excessive wear. Mounting bolts must thread properly and torque to specification without binding or cross-threading. Damaged threads may require professional repair or replacement of the entire caliper housing.
Installing New Seals and Components
Begin reassembly by coating the caliper bore with clean brake fluid. This lubrication helps new seals slide into position without twisting or rolling. Apply brake fluid generously but avoid contaminating work surfaces where dirt might stick to wet components.
Install the new piston seal in its groove using only your fingers or plastic tools. The seal should sit evenly in the groove without twisting or bunching. Work around the entire circumference to ensure proper seating and eliminate air pockets that could cause leaks.
Slide the new dust boot over the piston before installation. Some boots attach to the piston first, while others mount to the caliper housing. Consult your rebuild kit instructions for the correct sequence and attachment method for your specific caliper design.
Insert the piston into the caliper bore using steady, even pressure. The piston should slide smoothly without binding or tilting. If resistance occurs, stop and check for proper seal alignment or contamination in the bore. Force will damage seals and create future leak problems.
Reassembling the Complete Caliper
Position the dust boot properly around the caliper housing. Most boots feature a groove that engages with a corresponding ridge on the caliper body. This positive engagement prevents dirt and moisture from entering the caliper bore and damaging internal components.
Install any retaining clips or hardware included in your rebuild kit. These components secure dust boots and prevent seal displacement during operation. Follow the kit instructions carefully since different caliper designs use various retaining methods.
Apply a thin coat of brake caliper grease to sliding surfaces and contact points. This specialized lubricant withstands high temperatures and brake fluid exposure while preventing corrosion and binding. Avoid using regular grease, which can swell rubber seals and cause failures.
Double-check all components for proper installation and alignment. The piston should move freely without binding, and all seals should sit properly in their designated grooves. Any misalignment or improper installation will cause premature failure and safety issues.
Reinstalling the Rebuilt Caliper
Mount the rebuilt caliper to its bracket using the original bolts and hardware. Apply thread locker to bolt threads if specified by the manufacturer. Torque bolts to the specified value using a calibrated torque wrench to ensure proper clamping force without over-stressing components.
Reconnect the brake line using a new copper washer if provided. These washers create a pressure-tight seal that prevents brake fluid leaks. Tighten the connection to specification using the correct flare nut wrench to prevent damage to the fitting.
Install new brake pads if the originals show excessive wear or contamination. Brake fluid often contaminates pads during caliper failure, reducing their effectiveness and creating safety hazards. New pads ensure optimal braking performance and longer component life.
Verify that all connections are secure and properly aligned. Check brake line routing to ensure no interference with suspension movement or steering components. Improper routing can cause line damage and sudden brake failure.
Bleeding the Brake System
Proper brake bleeding removes air from the hydraulic system and ensures firm pedal feel. Start by filling the master cylinder with fresh brake fluid matching your vehicle’s specifications. Maintain adequate fluid level throughout the bleeding process to prevent air entry.
Begin bleeding at the wheel farthest from the master cylinder and work toward the closest wheel. This sequence ensures complete air removal and optimal system performance. Most vehicles follow a right rear, left rear, right front, left front bleeding sequence.
Use a brake bleeding kit or have an assistant help with the process. Open the bleeder valve while applying steady brake pedal pressure. Close the valve before releasing the pedal to prevent air from entering the system. Repeat this process until clear, bubble-free fluid emerges from the bleeder valve.
Test brake pedal feel and travel after completing the bleeding process. The pedal should feel firm and consistent without excessive travel or sponginess. If problems persist, repeat the bleeding process or investigate other system issues that might affect brake performance.
Testing and Final Adjustments
Perform a thorough brake system inspection before returning the vehicle to service. Check all connections for leaks, verify proper caliper operation, and ensure adequate brake fluid level in the master cylinder. Any issues discovered during this inspection require immediate attention.
Test brake operation at low speeds in a safe environment. Begin with gentle brake applications to verify proper caliper function and pad contact with rotors. Gradually increase braking force while monitoring for any unusual noises, vibrations, or pulling tendencies.
Allow the rebuilt calipers to properly seat and bed-in during initial operation. New seals and components require a brief break-in period to achieve optimal sealing and performance. Avoid aggressive braking during the first 50-100 miles of operation.
Schedule a follow-up inspection after 500-1000 miles of normal driving. This inspection allows you to verify that all components continue to function properly and identify any issues that might develop during the initial service period.
Common Mistakes to Avoid
Many DIY mechanics rush through the cleaning phase, leaving contaminants that cause premature seal failure. Take adequate time to thoroughly clean all components and work surfaces before beginning reassembly. Contaminated surfaces create leak paths and reduce rebuild longevity.
Using the wrong brake fluid type can damage rubber seals and cause system failure. Different brake fluid formulations have varying chemical compositions that may not be compatible with your caliper’s seal materials. Always use the fluid type specified by the vehicle manufacturer.
Over-torquing caliper mounting bolts creates stress concentrations that can crack housings or strip threads. Under-torquing allows movement that damages components and creates safety hazards. Use a calibrated torque wrench and follow manufacturer specifications exactly.
Failing to properly bed-in rebuilt calipers reduces their effectiveness and shortens service life. New components require gradual break-in to achieve proper sealing and optimal performance. Aggressive initial use can damage seals and create lasting problems.
Maintenance Tips for Extended Caliper Life
Regular brake fluid changes prevent internal corrosion and seal deterioration. Brake fluid absorbs moisture over time, creating corrosive conditions that damage caliper internals. Follow manufacturer recommendations for fluid change intervals to maximize component life.
Inspect brake calipers during routine maintenance to identify problems before they become serious. Look for fluid leaks, uneven pad wear, and signs of corrosion or damage. Early detection allows for preventive maintenance rather than emergency repairs.
Keep caliper slide pins clean and properly lubricated to ensure smooth operation. Binding slide pins cause uneven pad wear and reduced braking efficiency. Clean and lubricate these components during brake pad replacement to maintain proper function.
Use quality brake components and avoid bargain parts that may not meet original equipment standards. Inferior seals, pistons, and hardware often fail prematurely, requiring repeated repairs and compromising safety. Invest in quality components for lasting performance.
Conclusion
Rebuilding brake calipers provides an economical solution for maintaining your vehicle’s braking system while ensuring optimal safety and performance. This comprehensive process requires attention to detail, proper tools, and quality components, but the results justify the effort invested.
The skills you develop through caliper rebuilding extend beyond this single project. You gain valuable experience working with hydraulic systems, precision components, and safety-critical automotive systems. This knowledge proves invaluable for future maintenance and repair projects.
Remember that brake system work directly impacts vehicle safety and the protection of you and your passengers. When in doubt about any aspect of the rebuilding process, consult qualified professionals who can provide guidance and verification of your work.
Take pride in completing this challenging project while saving money compared to professional repair costs. Your rebuilt calipers will provide years of reliable service when properly maintained and operated. The confidence gained from successfully completing this project encourages you to tackle other automotive maintenance tasks with similar success.